Have you ever thought about the parts of a sewing machine? As a small and practical device that makes the whole sewing process a lot easier and faster – it is certainly a mysterious machine.
But to put it easy, everything they do is owed to how they’re made. And that can vary exponentially depending on the model you have. Generally, however, they have pretty similar parts.
If you want to understand how a sewing machine work and what you can get out of them – then you must learn what parts make it all possible. Here, we’re going to show you all that.
Whether it is fixing the sewing machine to your needs, you’ll be able to do it all after reading this article. So take a look below!
Different Parts of a Sewing Machine & Their Functions
The first section of this article will be about the sewing machine parts and functions. You’re going to learn how these parts work to ensure the sewing mechanism. And how they function together to adjust to different needs.
Here’s a brief explanation of each with their respective function:
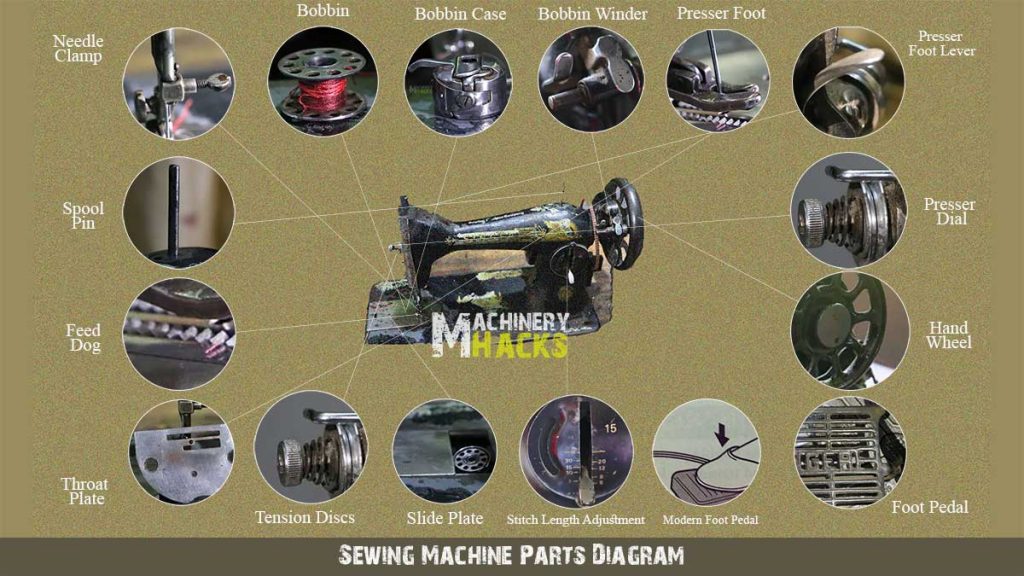
Needle & Clamp
Among our sewing machine images and parts, we had to bring the needle and clamp. There’s not much to explain about this. It contains the needle that stitches and the clamp that secures it on the machine.
Take-up Lever
This part is typically located over the needle, close to the thread holder or spool pin. Its purpose is to regulate the thread tension to ensure it feeds properly into the needle.
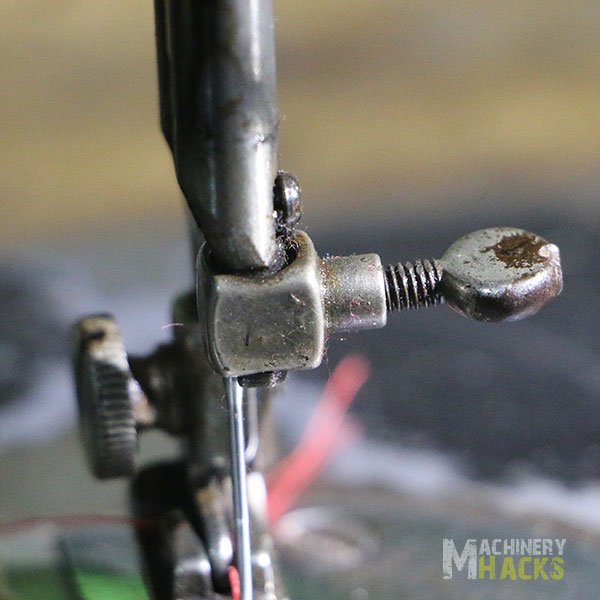
Spool Pin or Holder
The part that holds the sewing thread is called a spool pin or holder. It can be horizontal or vertical, depending on the machine design. Sometimes, it can be used to control how the thread feeds into the machine.
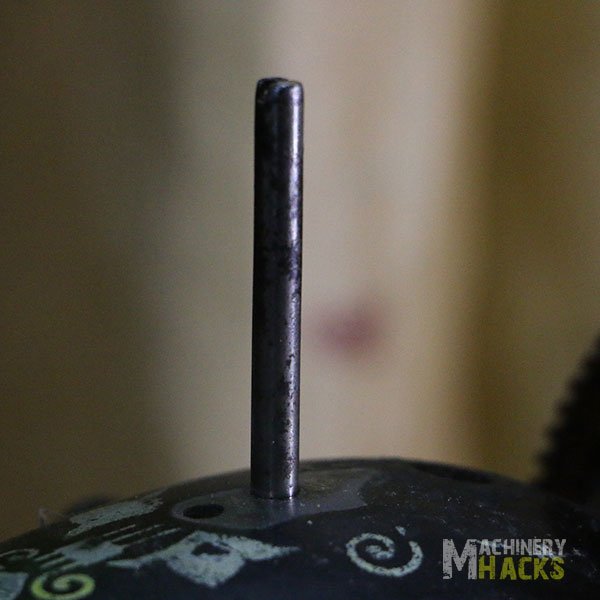
Bobbin & Case
A bobbin and its case are two critical sewing machine parts name with picture.
The bobbin case usually goes just under the needle plate. And the bobbin goes inside the case. Together, they hold and feed the thread that goes below, which helps to create the loop for every stitch.
Bobbin Winder
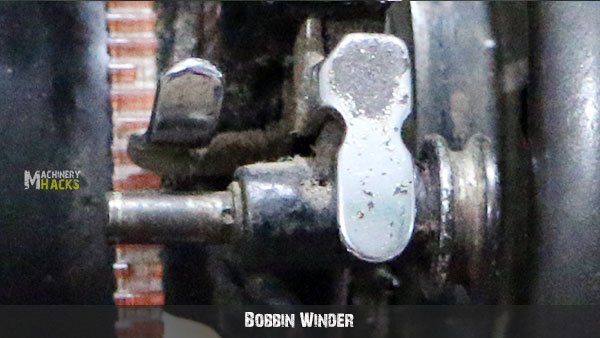
When the bobbin runs out of the thread or loosens up, the bobbin winder helps to get it out or adjust it. This part can be located on the bottom part or right side of the machine.
Presser Foot
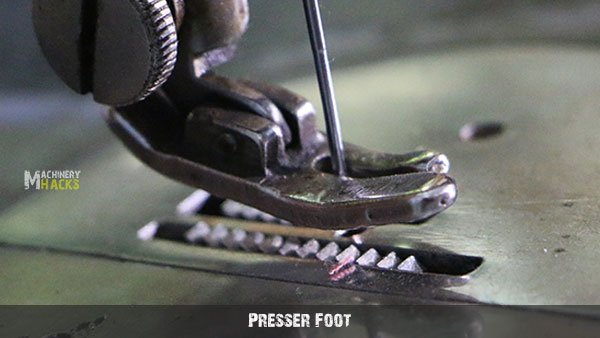
This part goes below the needle. It is what presses the fabric into the feed-dog. It flattens the material to ensure the needle goes smoothly through it. The name comes from its shape that looks like a foot.
Presser Foot Lever
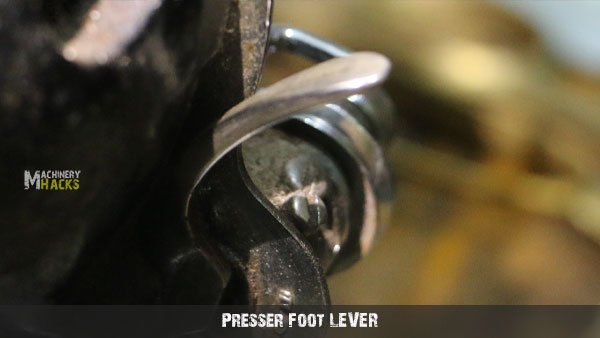
When you want to adjust the presser foot, you use the lever to disengage it from its place. This will also disengage the tension discs from the operation.
Presser Dial
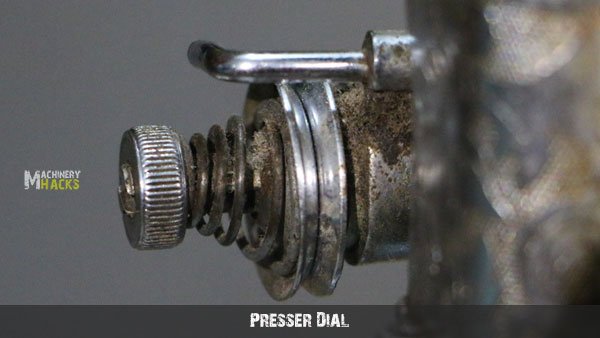
Some sewing machines have a presser dial. This part lets you adjust the amount of pressure you want to exert over the fabric with the presser foot. It helps to work with fabrics of different thicknesses by adjusting the pressure depending on how thick they are.
Feed Dog
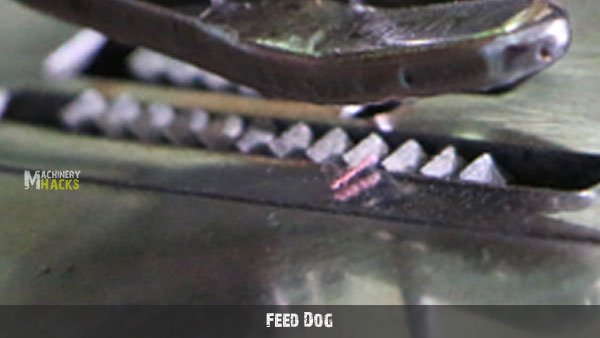
As you should know, the function of sewing machine is to make stitches on a straight line. For that, the mechanism needs to move the fabric every time the needle makes a stitch. That’s what the feed dog is for.
This part has some teeth-like components that hook into the fabric and move it away from the plate so the machine can keep on stitching.
Throat Plate
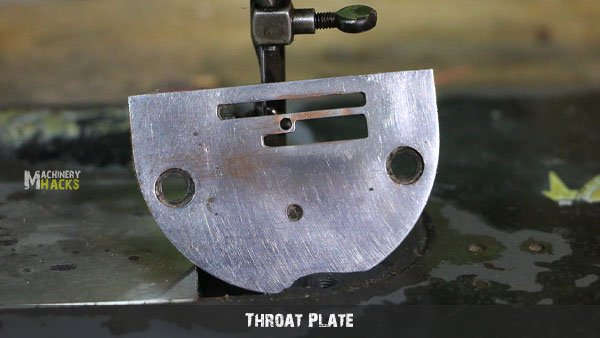
The throat plate is what goes on top of the bobbin and the feed dog. It is called a “throat” plate because it contains a hole where the needle goes through to reach the bobbin. Also, it has slots where the feed dog teeth are located.
Slide Plate
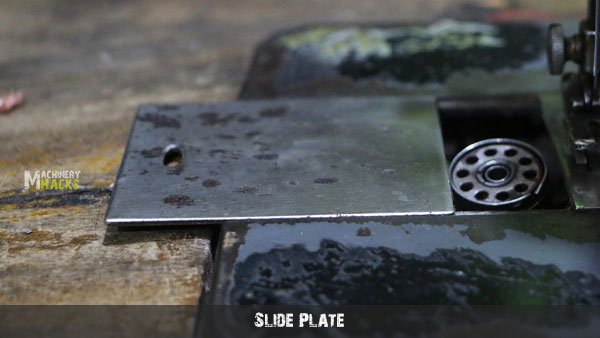
Located beside the throat plate, the slide plate is what allows access to the bobbin. Because it has a sliding mechanism, it enables easy access and ensures the user can maintain and adjust the machine as needed.
Face Plate & Casing
This part conceals the internal mechanism of the sewing machine. You can say it is the metal cover that gives the sewing machine its form while protecting its internal components.
Foot Pedal
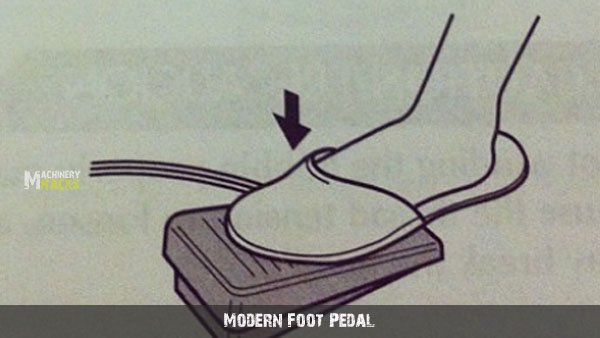
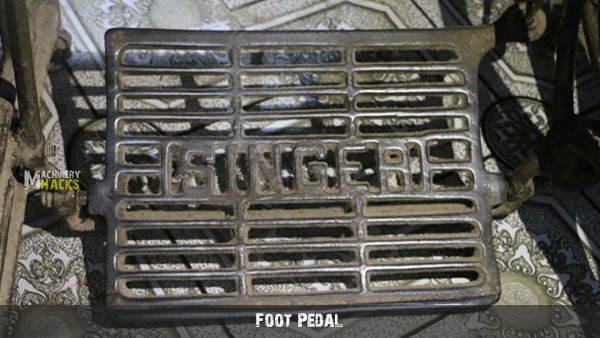
The foot pedal is located under the sewing machine. In modern models, this part usually connects to the machine via a small cable. But in older models, it was connected via a slightly more complicated mechanism.
Either way, the focus of this part is to adjust the speed at which the machine sews. The harder the user pushes the pedal, the faster the sewing machine will sew.
Reverse Lever
When it comes to securing stitches, the user needs to put the machine in reverse. This will make the needle and feed-dog move backward, stitching towards the other side. This part is usually located on the front face of the machine for easy access.
Pattern Selector
This part is common on modern machines. It allows the user to change the type of stitching pattern for the job.
Stitching can go from zig-zag to straight, overlocking, and so on. These patterns depend on the machine type. It is typically located on the right side or body of the machine.
Hand Wheel
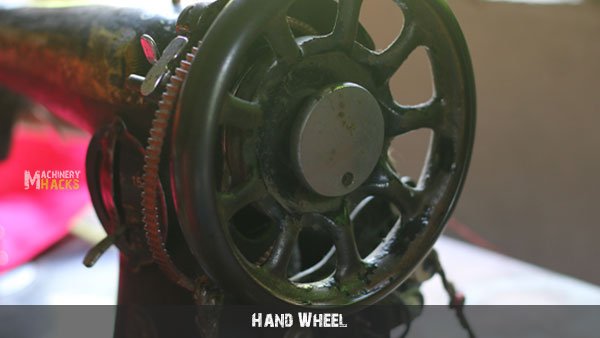
If you’ve ever seen someone using a sewing machine, you know what this handwheel looks like.
This part connects directly to the needle mechanism. And it helps to lower it or lifting it from the sewing area as needed.
Whether it is adjusting the needle position over the fabric or disengaging from the sewing area – this handwheel is an essential part of every machine.
Stitch Length Adjustment
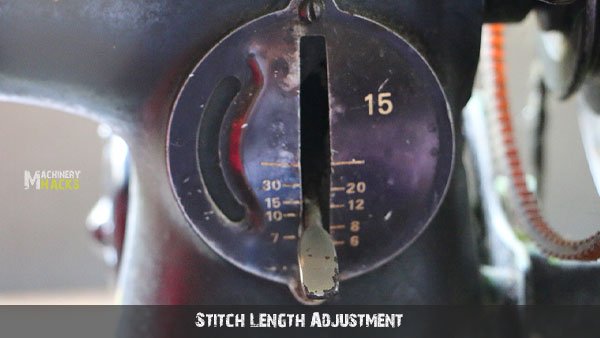
As much as you can adjust the pattern, you can also change the stitching length. Most machines have a length limit of about 4 inches. But it can vary depending on the model.
This part is usually located close to the feed-dog mechanism (the section below the needle plate). And it helps to adjust how much fabric is fed before the needle comes back to make another stitch.
Tension Discs
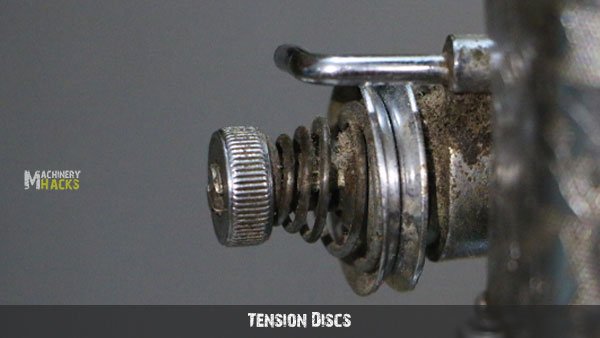
One of the most common industrial sewing machine parts is the tension disc. You may also find it on domestic models.
The whole purpose of tension discs is to control how much pressure the needle applies to the fabric. This part usually has numbers that tell how much tension it is using. The higher the number, the more tension it will produce on the material.
Using the tension discs will by adjust the position, the thread flow, the thread passage, and even how smoothly the needle goes up and down.
Sewing Light
For people who like to work in dark areas, the sewing light helps them have more visibility. It is tpyically located close to the needle.
Thread Cutter
Cutting thread is a constant while using a sewing machine. That’s why they need a thread cutter. It looks like small crevice or knife-like piece, usually close to the needle. The whole purpose of this piece is to prevent tangles and speed up the sewing process.
Frequently Asked Questions
Even though they look enormously different, vintage sewing machines were actually very similar to modern ones. But even then, old machines have gone a long way – so they have several parts that you won’t find in modern ones.
Among the many vintage Singer sewing machine parts, you will find:
Vintage Sewing Machine Parts
Belts (Leather Belts)
This part used to do the work that pulleys do today. It connected to the internal cranks to ensure the operation of the machine.
Because they were a belt, they were usually thicker and heavier. That’s a big reason why older sewing machines were slower.
Bobbins
Among the many vintage sewing machine parts, you will also find bobbins and their cases. They weren’t entirely different in operation, but they were placed in different places.
Instead of going below the slide plates, bobbins used to go on the side or top of the sewing machine. As you can guess, this made the stitching operation a lot slower.
Bobbin Winder
A vintage sewing machine didn’t have a bobbin winder as modern ones do. The winder was instead a cover with screws where the bobbin with the thread was located.
Foot Pedal
The foot pedal on a classical sewing machine also changed. Instead of a pedal connected to the machine with a cable, it was a metal grid under the machine. It was connected via an array of pulleys and cranks.
Slide Plates
Among the many Singer sewing machine parts that changed enormously, you’ll find the slide plates. Instead of a small slide plate-like in modern models, vintage machines had two slide plates. Below them, you will encounter the shutter mechanism.
Feed Dog
Older machines didn’t have the feed-dog mechanism that moves the fabric as the needle made the stitches. So people had to move the fabrics manually.
Conclusion
So, are you familiar with the parts of a sewing machine now? It is time you start learning how to use and repair them as necessary.
Use this guide to know exactly what you will be working with. Whether it is for stitching more efficiently or learning how it operates – this guide should help you enormously.
Just remember that modern and vintage models can vary exponentially, and different types of sewing machines may have fewer or more parts accordingly. But overall, this general list of parts should give you a better idea of what you’ll be getting.
correct explination with drawing